Adding a domain in Webuzo as an end user is easy and lets you expand your website’s capabilities by managing multiple domains under one hosting account. Whether you’re setting up a new website, creating a subdomain for a project, or adding a parked domain, Webuzo provides a straightforward way to add and manage domains. Let’s walk through each step in detail to make sure you’re ready to go!
Table of Contents
Step 1: Access Your Webuzo End-User Panel
To start, you need to log in to the Webuzo control panel where you can manage all your hosting settings.
- Open your browser and go to
http://yourdomain.com:2002. Replace “yourdomain.com” with the domain where Webuzo is installed. - Enter your Webuzo username and password. This will bring you to the end-user dashboard, where you can access your hosting features.
Step 2: Navigate to the Domain Management Section
Once you’re in the dashboard, you’ll find several sections for managing different aspects of your hosting.
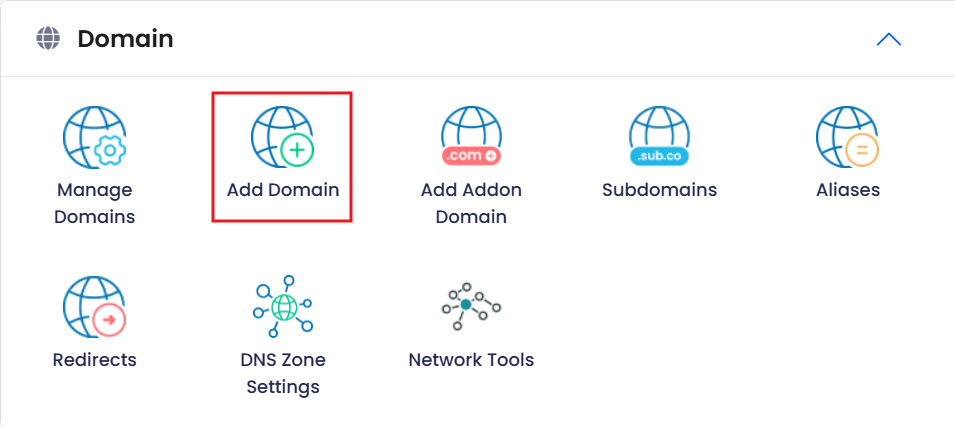
- Look for the Domain section, usually found under Domain Settings or on the main dashboard page.
- Click on Add Domain. This option will let you register a new domain to your hosting account.
Step 3: Enter Your Domain Information
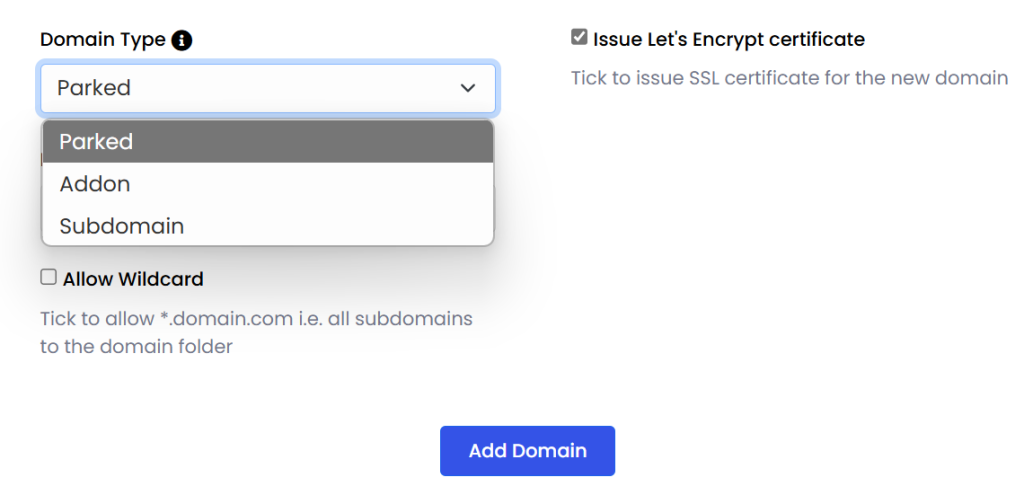
Now, you’ll see a form where you can enter the details of the new domain you want to add.
- Domain Name: Enter the full domain name (e.g.,
example.com) you’d like to add. Make sure you own or have access to manage this domain. - Document Root: Webuzo will usually create a default folder for this domain (such as
/home/username/public_html/yournewdomain.com), but you can specify a different directory if needed. This is the folder where the domain’s website files will be stored.Example: If you’re adding a blog as a subdomain, you might specify a directory like/home/username/public_html/blog.
Step 4: Optional DNS Settings Configuration
If you’re using Webuzo to manage your DNS, you can set up any DNS records (like A, CNAME, or MX records) for your new domain. This step isn’t always required, but it’s helpful if you need email services, subdomains, or any additional configurations.
- Head over to the DNS Zone Settings in the Webuzo dashboard.
- Locate the new domain and add any DNS records you might need:
- A Record: Points your domain to an IP address.
- CNAME Record: Points to another domain, often used for subdomains.
- MX Record: Used for setting up email services.
If your DNS is managed elsewhere, skip this step and update those DNS settings directly with your provider.
Step 5: Finalize and Save
Once everything looks correct, it’s time to add the domain officially.
- Click on Add Domain to save your settings.
- Webuzo will now create the domain and apply the necessary settings. This process usually completes within a few seconds.
Step 6: Check and Confirm
After adding the domain, it’s a good idea to confirm everything is set up correctly.
- Go back to the Domain section in your Webuzo dashboard. You should see your new domain listed there.
- Open a new browser tab and type in your new domain to make sure it’s accessible. If you’re waiting on DNS propagation (which can take anywhere from a few minutes to 24 hours), it might not load immediately.
Additional Tips for Managing Your Domain
- SSL Setup: For security, consider adding an SSL certificate for your new domain. This can usually be done through the SSL/TLS settings in Webuzo.
- Web Applications: If you plan to install a CMS or other software (like WordPress), you can use Webuzo’s one-click installer for easy setup on your new domain.
- Subdomains and Parked Domains: Webuzo allows you to add multiple types of domains, so you can add subdomains (like blog.example.com) or parked domains that point to your main site.
Troubleshooting Common Issues
- DNS Issues: If your domain doesn’t resolve, double-check your DNS settings or contact your domain registrar if DNS is managed outside Webuzo.
- Directory Path: Ensure that your document root path is correct so that your website files are stored and accessible in the right place.
- SSL Errors: If you’re getting security warnings, make sure you have a valid SSL certificate installed and configured for the new domain.
Adding a domain in Webuzo as an end user is a quick process, but it offers a lot of control over how your domain is set up and managed. This flexibility makes it easy to grow your online presence, add new projects, or organize different sites under one hosting account.